Maya 2016 Extension 2 now includes the MASH plugin, which is an excellent tool for all kinds of motion graphics tasks. In this short tutorial we will use it for the controlled distribution of different objects across a hilly ground. You can download Maya 2016 Ext. 2 here. In Maya > Settings / Preferences > Plug-in Manager make sure that the MASH.mll is loaded.
For the terrain we will use free available height maps. Go to the website http://terrain.party/ select a region you like, export the tile and copy the files to your sourceimages folder.

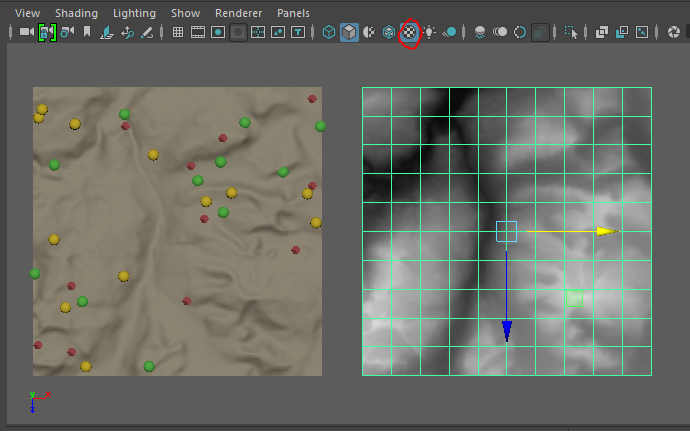
In Maya create a Poly Plane, make it 50×50 and subdivide it by 100×100. With the plane selected go to > Deform > Texture.

In the Texture Deformer Attributes connect the downloaded height map to the Texture slot with a file node. With the Strength slider you can increase the height of the deformation.
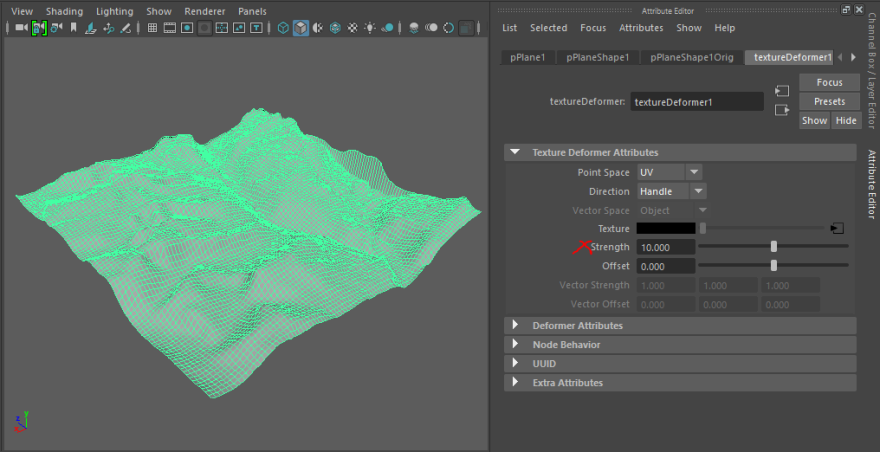
To eliminate glitches at the edge apply UV > Planar > (Options) > Project from Y axis. With the handles the placement of the terrain texture can be adjusted.
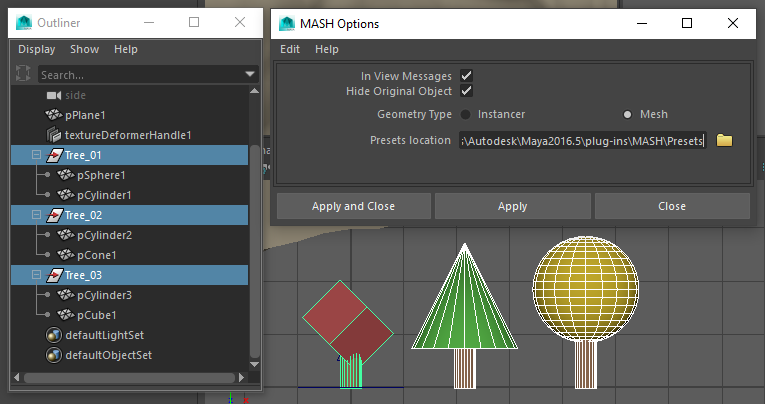
Now let’s Create > Empty Group several times and rename the null objects in the Outliner. They will serve as our pivot points. Create some different poly shapes and drag them with MMB into the null objects. Make sure that the y-origin of the objects is at 0, otherwise they will be positioned below the ground. With the Control Key select just the parent nulls. Create > MASH > Create MASH Network > Options. At Geometry Type are two options. With “Instancer” MASH creates instances of the input geometry tending to solve faster. The “Mesh” option is more versatile and for now we go with that option.
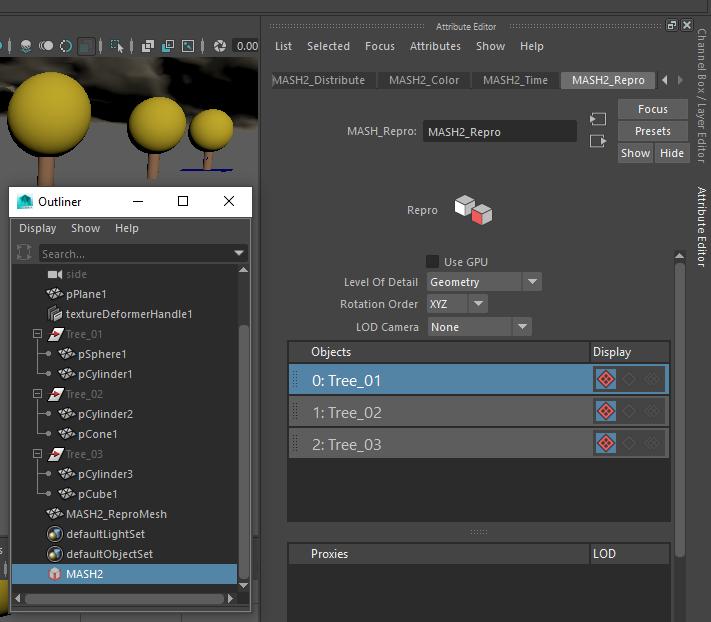
Our input objects turn invisible and we see one input object copied linear. Now select the MASH object in the Outliner and in the Attribute Editor you can see several new tabs. When you go to the MASH Repro tab you can see that the previously selected objects are now part of the MASH network. MMB dragging additional objects from the Outliner into the Objects list would add them to the MASH network.
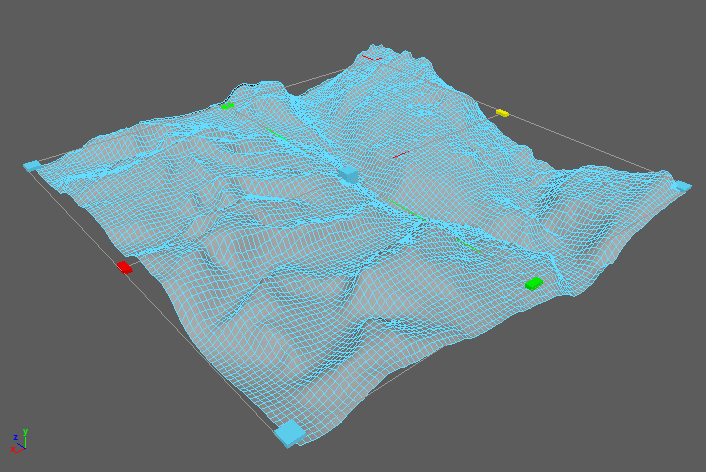
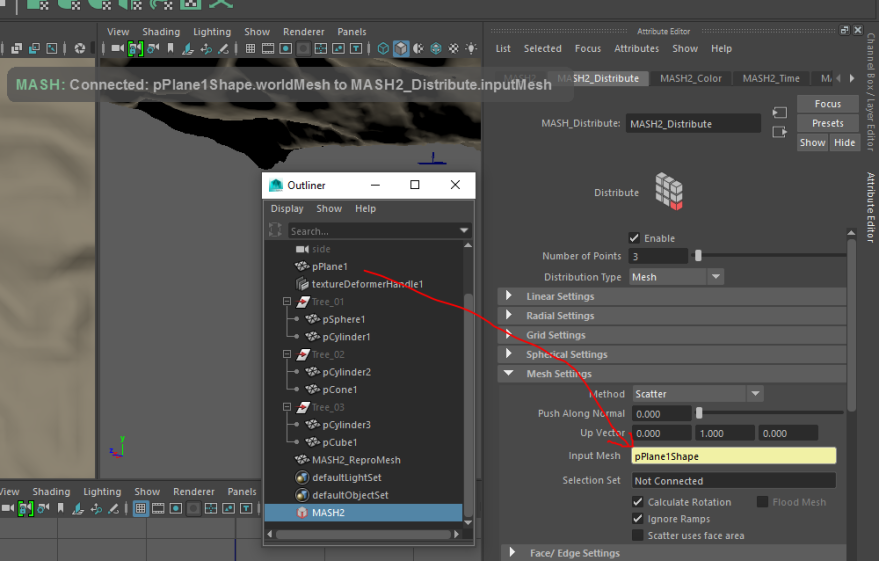
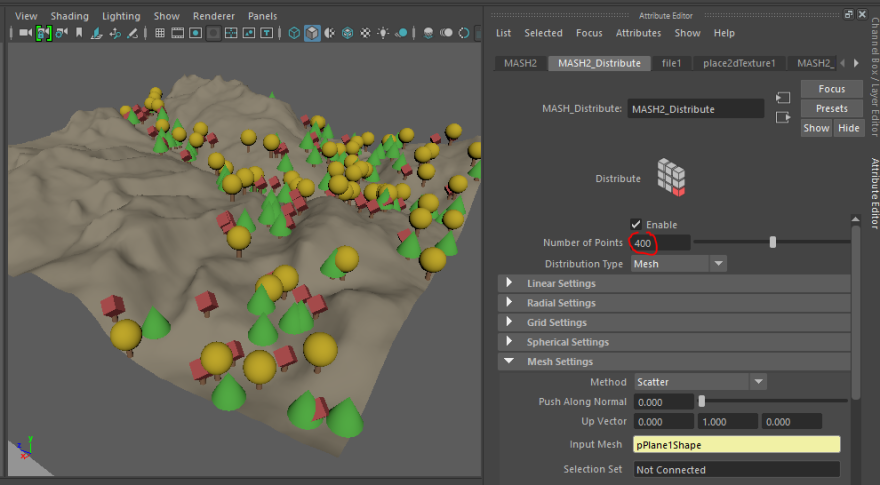
Now go to the MASH Distribute tab and expand the Mesh Settings options. MMB drag the terrain to the Input Mesh field. The Distribution Type automatically changes to “Mesh” and we get a “MASH: Connected: ….)” feedback in the viewport.
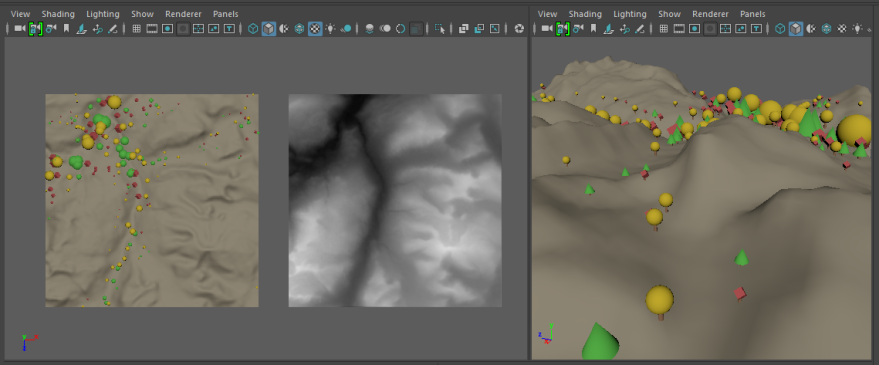
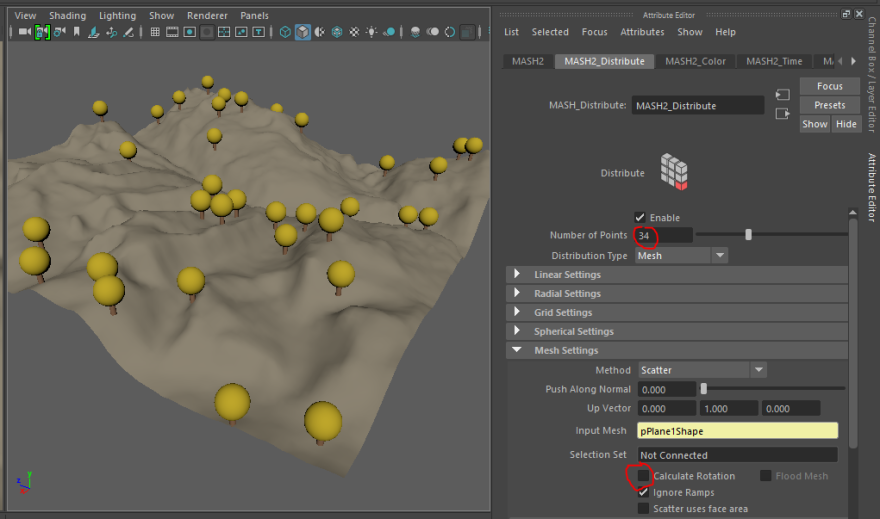
By increasing the Number of Points we can already see the distributed objects on the terrain. By default the copies are oriented along the terrain’s surface normal. To plant them upright untick “Calculate Rotation”.
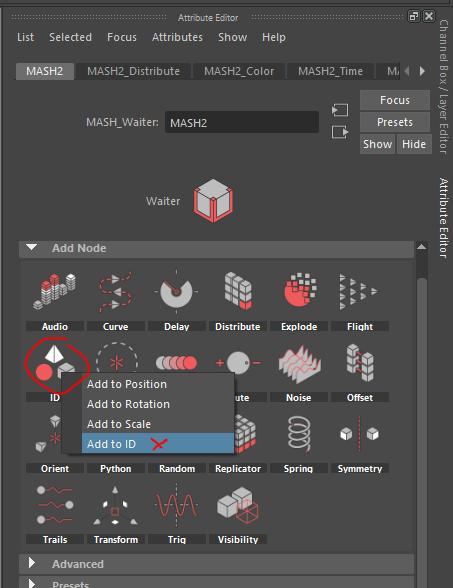
We still see only one object replicated. To make all different types visible we go to the MASH main tab (the “Waiter”) and Add Node > ID > Add to ID.
Now all Objects are included.

Let’s modify the distribution of the trees, they should mainly grow in the valleys. Create another Poly Plane of the same size and 10×10 Subdivisions, place it beside the terrain. Assign a new Lambert material. Connect the map we used for the terrain to the Color channel. Switch on “Textured” in the viewport.
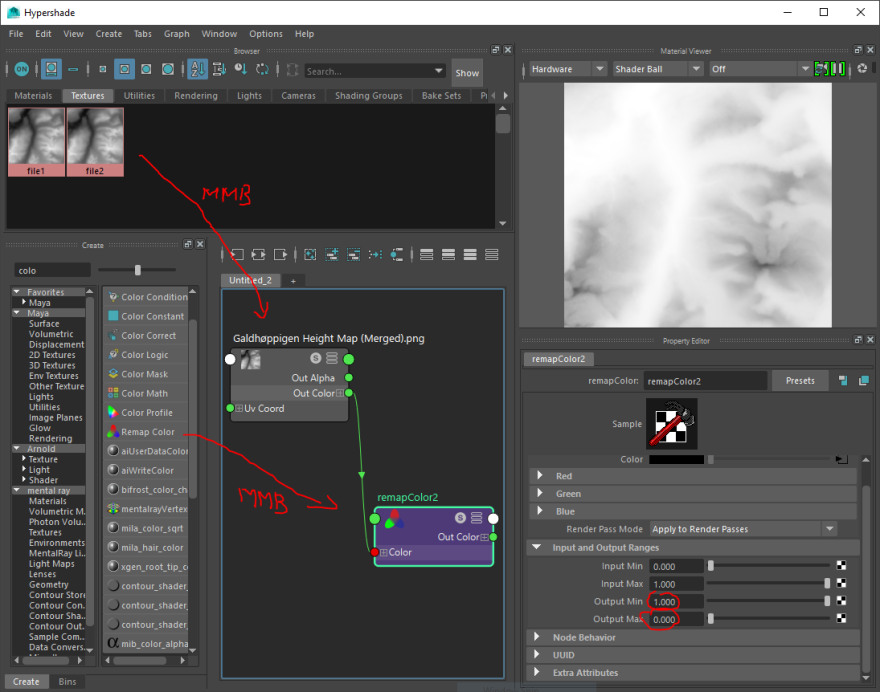
Open the Hypershade window. MMB drag the second texture file to the graph editor. Search for the Remap Color node and MMB drag it aslo there. Connect the Out Color of the file node with the In Color of the Remap Color node. With the Remap Color node selected change the Output Min to 1 and Output Max to 0 at the Input and Otput Ranges section. This simply inverts the image.
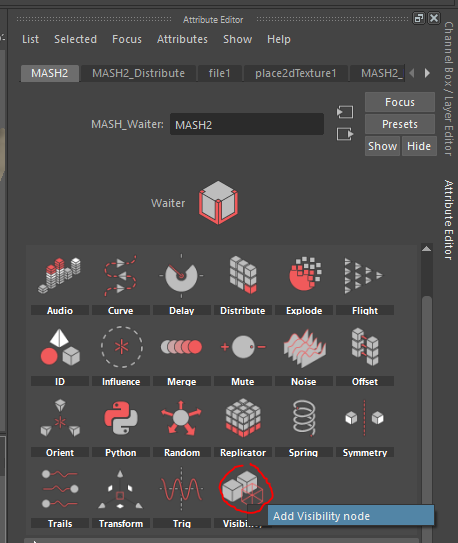
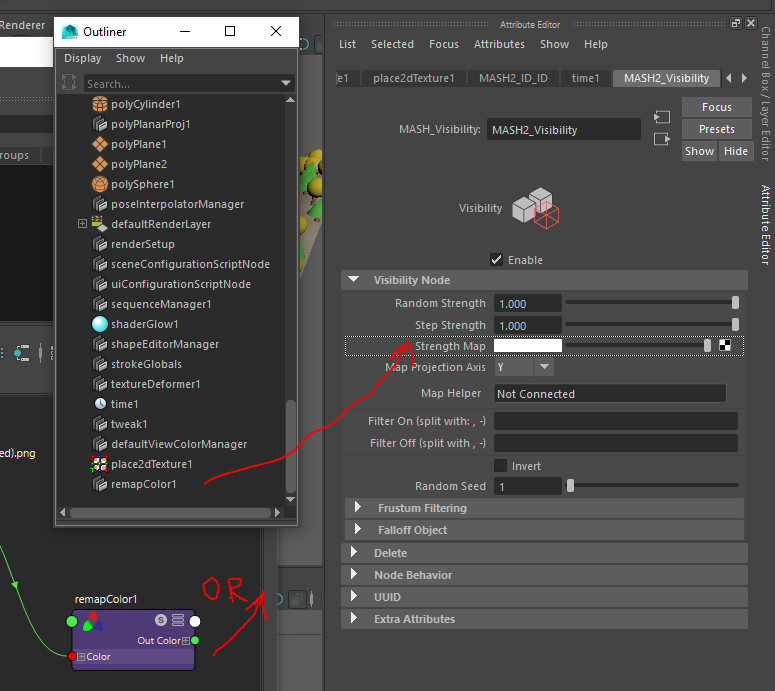
Go to the MASH Waiter and add a Visibility node.
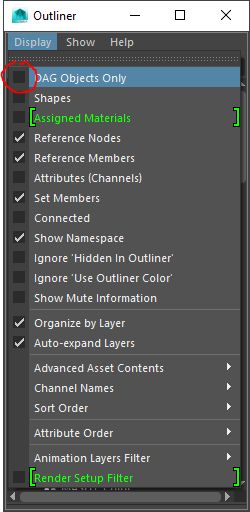
In the Outliner > Display untick “DAG Objects Only” to make all nodes visible.
Now MMB drag the remapColor node from the Outliner to the Strength Map field of the MASH Visibility node. Alternatively you can also MMB grab the node directly from the Hypershade window.
When we increase the Number of Points in the MASH Distribute node it becomes obvious that the distribution of our trees is controlled by the darker areas of the texture file.
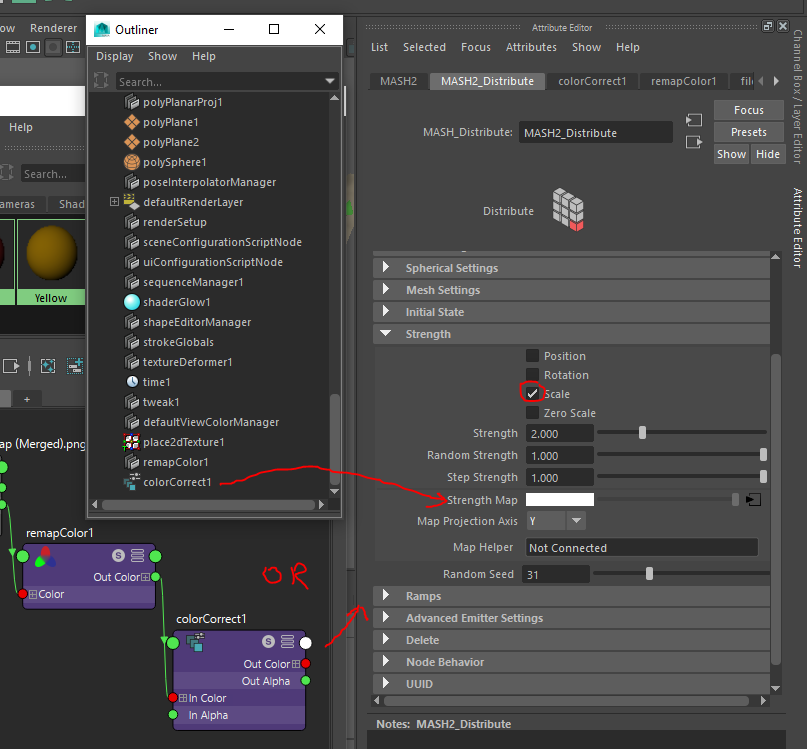
To add some finesse we can also control the scale of our trees. In the Hypershade window add a Color Correct node, attach its color input to the Remap Color output and lower the Gamma values to increase the contrast.

Select the MASH object in the Outliner, switch to the MASH Distribute tab and MMB drag the Color Correct node from the Outliner or the Hypershade window to the Strength Map slot. Make a tick at Scale and adjust the Strength.
Voilà. Instead of the height map you could use any kind of texture to control the scattering.